Push-ups are one of the most effective and versatile bodyweight exercises. They engage multiple muscle groups, including the chest, shoulders, triceps, core, and even the back. But here’s the catch—as simple as push-ups may look, doing them without proper form can lead to injuries and reduce their effectiveness. Mastering the correct form for push-ups is crucial to maximize the benefits and maintain a safe workout routine.
If you’re unsure how to get it right, don’t worry. This guide will walk you through step-by-step instructions to perfect your push-up form.
Why Correct Form Matters
Proper form prevents strain on your joints and ensures the muscle groups you’re targeting are effectively engaged. Here’s why mastering the correct form for push-ups is critical:
- Prevent Injuries: Bad form, such as misaligned hands or a sagging back, can strain your wrists, shoulders, and lower back.
- Improve Efficiency: Correct form distributes effort evenly across the targeted muscles, helping you build strength faster.
- Achieve Better Results: By engaging the right muscles, you increase the effectiveness of the exercise and work your body the way it’s meant to move.
Now that we understand why form matters, let’s break down how to perform a push-up correctly.
The Correct Form for Push-Ups
Follow these steps to master the perfect push-up:
Step 1: Set Up Your Base
Begin by placing your hands shoulder-width apart on the floor. Your palms should be flat, fingers pointing forward, and hands in line with your shoulders.
- Common Mistake: Placing your hands too wide or too close together can cause undue strain on your shoulders or wrists.
- Tip: If you’re unsure about hand placement, imagine you’re forming an invisible straight line extending from your shoulders down to your wrists.
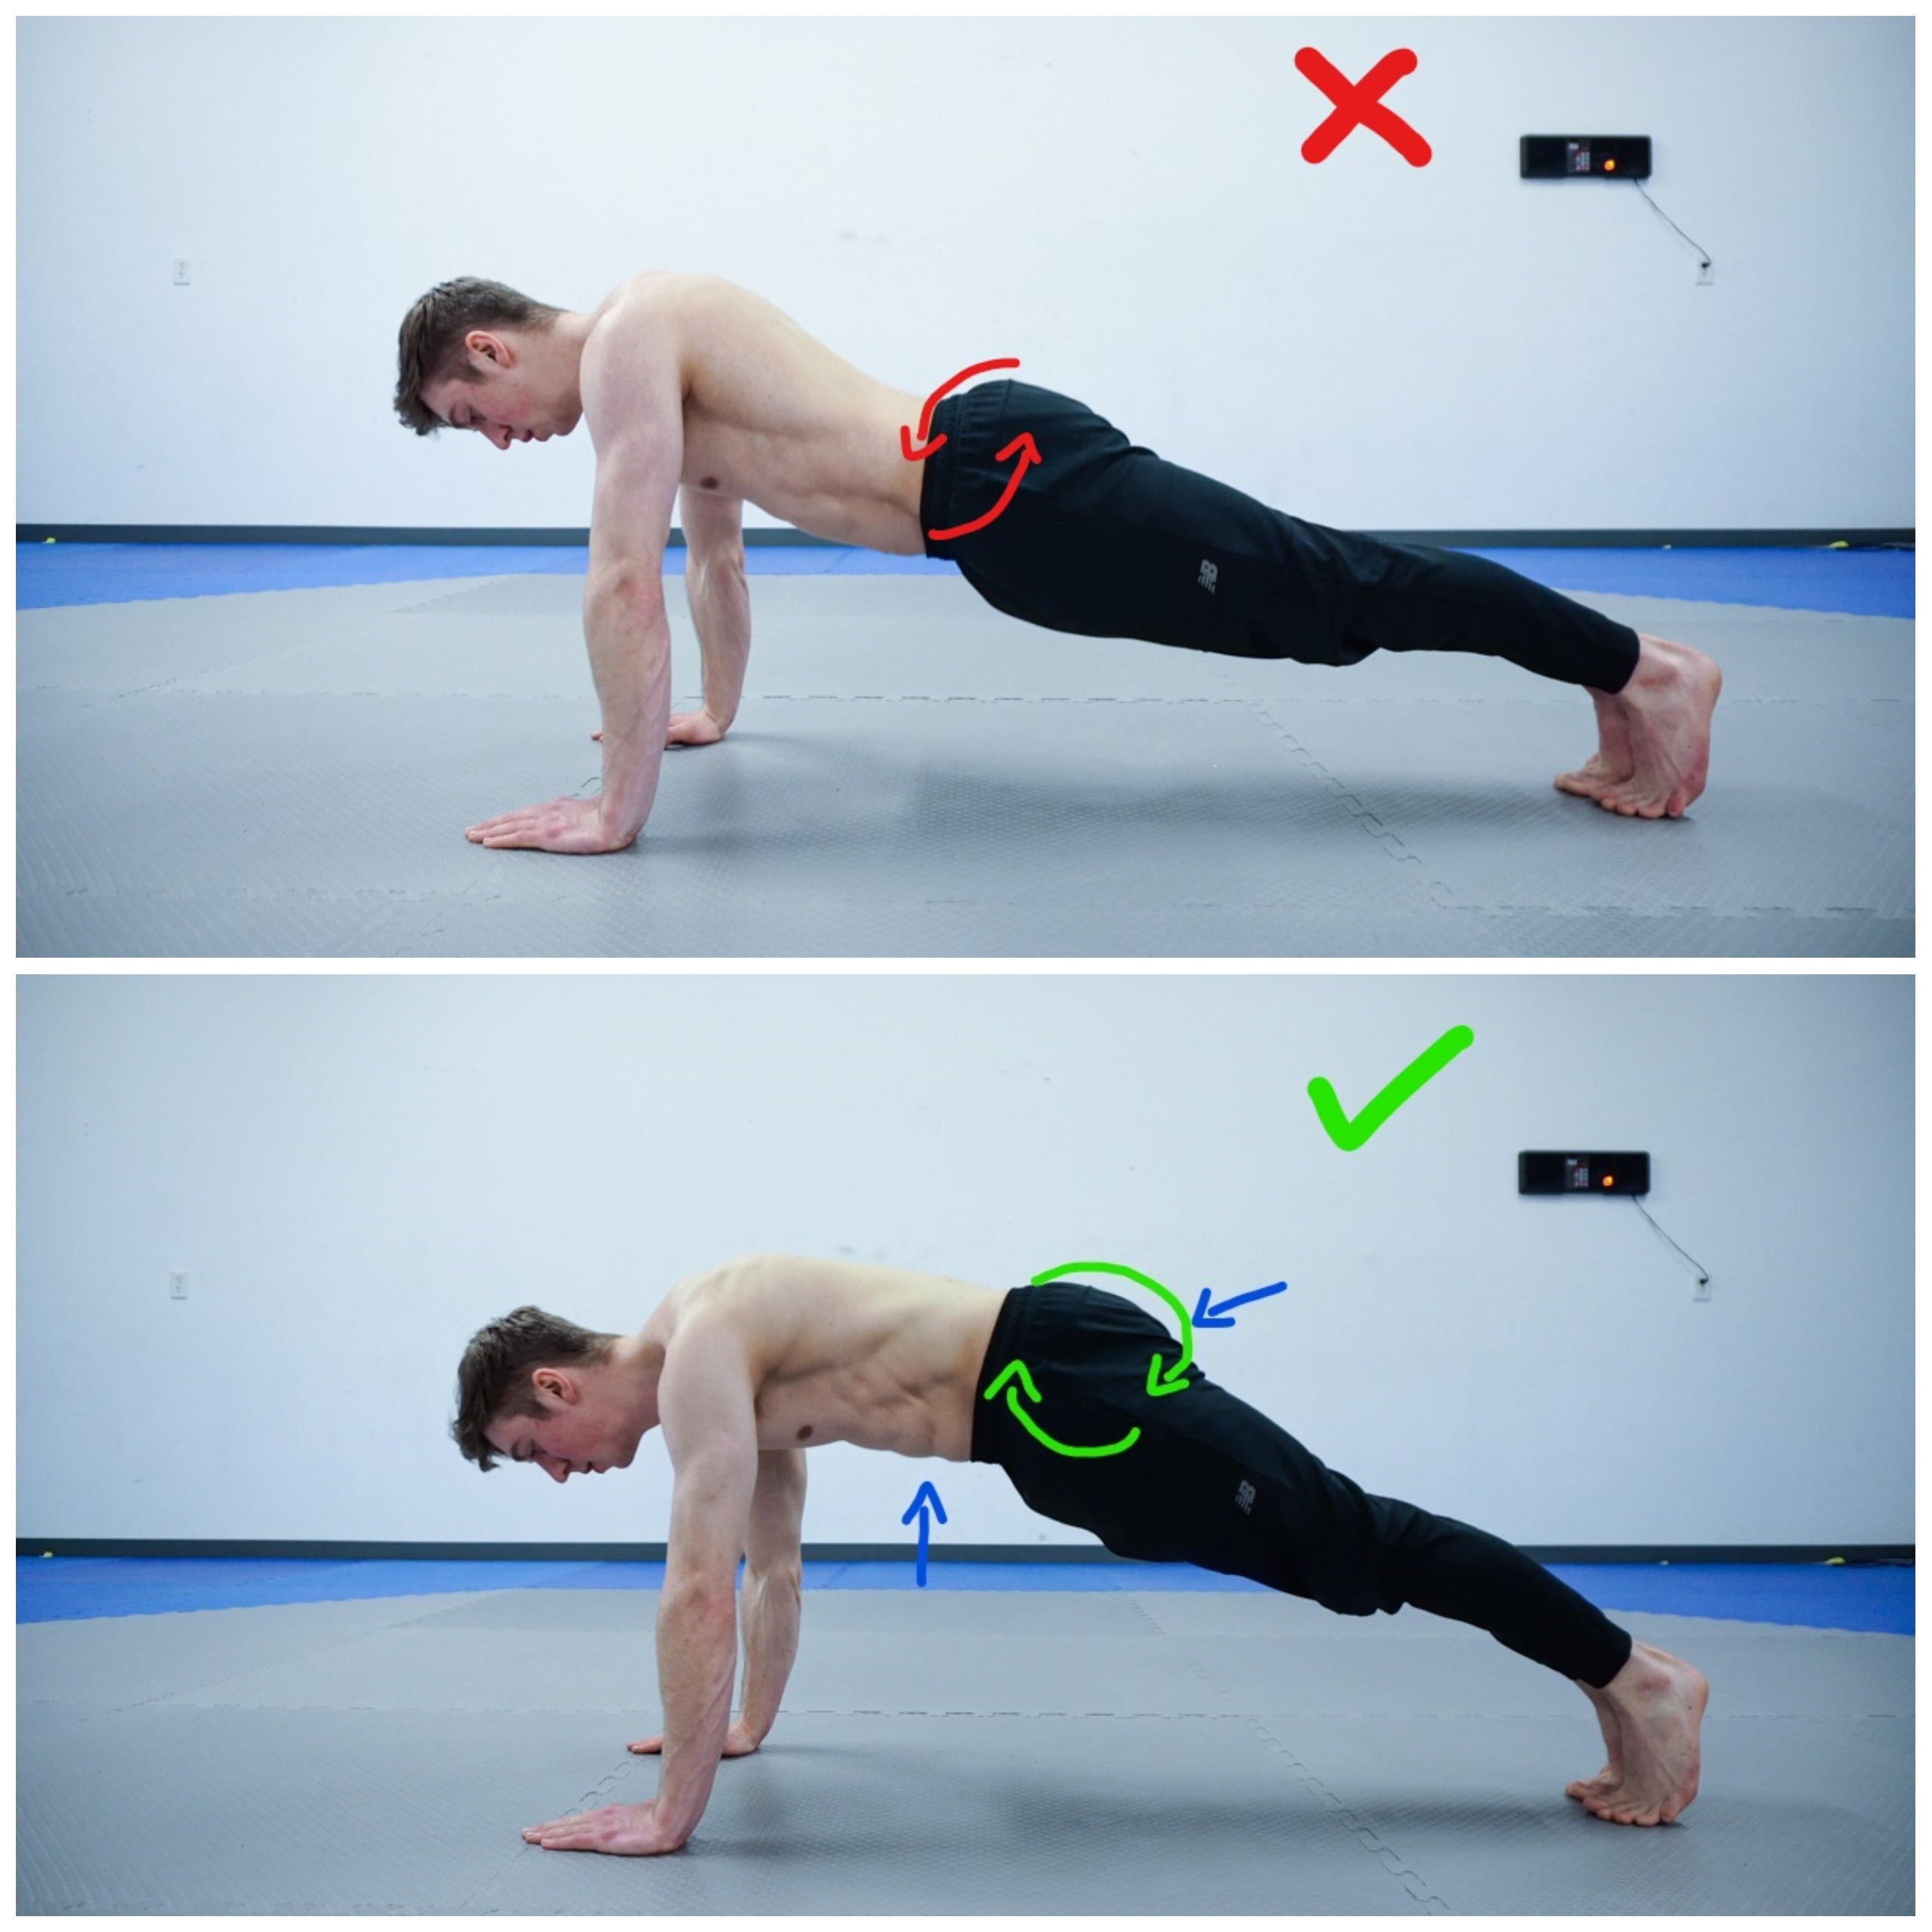
Step 2: Align Your Body
Keep your body in a straight line from head to heels. Imagine a plank of wood resting on your back to maintain this alignment. Engage your core, tighten your glutes, and avoid letting your hips sag or rise too high.
- Common Mistake: Sagging hips or arching your back, which places unnecessary stress on your lower back.
- Tip: Activate your abs and glutes throughout the movement to maintain stability.
Step 3: Position Your Feet
Place your feet shoulder-width apart, or slightly closer for added stability. If you’re a beginner, feel free to separate them a bit more for balance.
- Common Mistake: Uneven or overly wide foot placement can shift your form and balance.
- Tip: Keep your toes firmly planted on the ground to maintain control.
Step 4: Lower Your Body
Begin lowering your chest toward the ground. Keep your elbows at a 45-degree angle relative to your torso (not flared out to the sides). Lower yourself until your elbows are at a 90-degree angle, or your chest is just above the floor.
- Common Mistake: Dropping your head or flaring your elbows out wide, which reduces muscle engagement and can strain your shoulders.
- Tip: Keep your gaze slightly ahead of you to maintain neutrality in your neck.
Step 5: Push Back Up
Press through your palms to push your body back to the starting position. Straighten your arms while maintaining control, and avoid locking your elbows at the top.
- Common Mistake: Rushing through the movement, which sacrifices form and decreases effectiveness.
- Tip: Move in a slow and controlled manner to fully engage your muscles.
Step 6: Breathe Correctly
Breathing is often overlooked, but proper breathing enhances your performance. Exhale as you push up and inhale as you lower your body.
- Common Mistake: Holding your breath during the movement, which can lead to dizziness or fatigue.
- Tip: Find a rhythm that works for you, helping you to stay consistent.
Modifications for Different Fitness Levels
Whether you’re a beginner or more advanced, there are push-up variations to suit your fitness level.
Beginner Modifications
- Knee Push-Ups: Perform the movement with your knees on the ground for additional support while maintaining proper alignment.
- Wall Push-Ups: Stand at an angle and push against a wall to reduce the difficulty.
Advanced Modifications
- Diamond Push-Ups: Position your hands closer together to target your triceps more effectively.
- Elevated Push-Ups: Place your feet on an elevated surface (like a bench) to increase intensity.
Common Mistakes to Avoid
To ensure you’re getting the most out of your push-ups and reducing your risk of injury, avoid these common form issues:
- Sagging Lower Back: Engage your core to prevent unnecessary strain on your lower back.
- Flared Elbows: This can create shoulder discomfort and reduces the targeting of your chest muscles.
- Rushing the Movement: Slow, steady, and controlled push-ups are more effective than speeding through reps.
- Improper Hand Placement: Keep hands aligned with your shoulders to avoid wrist strain and ensure balanced effort.
Benefits of Push-Ups with Correct Form
When done properly, push-ups are one of the most rewarding bodyweight exercises. Here’s what you’ll gain:
- Full-Body Strength: Push-ups work your chest, arms, shoulders, core, and even your legs to some extent.
- Functional Fitness: Push-ups are a compound exercise that mimics movements in daily life, enhancing your overall strength.
- Convenience: No equipment is needed, making it easy to incorporate into any fitness routine.
Start Improving Your Push-Ups Today
Now that you know the correct form for push-ups, it’s time to put that knowledge into action. Whether you’re just starting out or looking to refine your technique, push-ups are an essential workout staple for building strength, improving fitness, and even boosting your confidence. Start slow and focus on perfecting your form before increasing reps or exploring advanced variations.
Remember, intensity can always be built up over time, but proper technique is the foundation for a safe and effective exercise routine. Happy push-upping!